Polarity in electronics means a component or power connection has a correct direction. Positive and negative sides matter for parts such as batteries, LEDs, diodes, electrolytic capacitors, and many integrated circuits. Other parts, such as most resistors, can usually be installed either way.
Last updated: June 18, 2026
Why Polarity Matters in Beginner Circuits
Polarity is one of the first reasons a simple circuit “does not work” even when all the parts are present. A student may have the right LED, the right battery, and the right resistor, but if the LED is reversed the circuit may stay dark. In other cases, reversing polarity can damage a component.
SparkFun’s polarity guide explains the core idea clearly: some components and connections only work when current flows in the intended direction. That is exactly the version of polarity most teachers need for beginner electronics.
A Simple Definition Students Can Remember
Try this sentence: polarity means direction matters. If a part has a positive side, a negative side, an anode, a cathode, or a band or stripe marking, students should stop and check orientation before they power the circuit.
This is easier for students than leading with abstract language about electric fields or semiconductor junctions. Start with the habit, then add the deeper explanation as students gain experience.
Polarized vs Non-Polarized Parts
| Part type | Does direction matter? | What students should look for |
|---|---|---|
| Battery | Yes | + and - symbols, wire colors, terminal shape |
| LED | Yes | Long leg, flat edge, anode/cathode labels |
| Diode | Yes | Band marking on one end |
| Electrolytic capacitor | Yes | Stripe and lead markings |
| Resistor | No | Either direction is usually fine |
| Basic jumper wire | No | Connection point matters more than direction |
Battery Polarity Is the First Check
Before students ever place an LED on a breadboard, they need to locate the battery’s positive and negative sides. SparkFun’s component examples point out that batteries usually label terminals with + and - symbols, and wire colors often follow the human-friendly convention of red for positive and black for negative.
That color code is a convenience, not a law of nature. Students still need to trace the actual connection. This is a good place to connect polarity to troubleshooting routines instead of treating it as a vocabulary quiz.
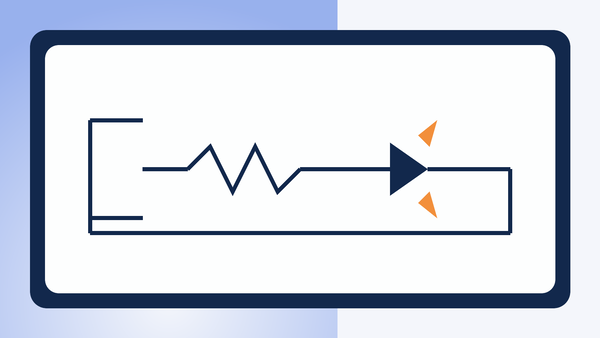
LED Polarity Is the Most Useful Beginner Example
LEDs are excellent teaching tools because polarity has an immediate visible result. In Adafruit’s beginner LED guide, the longer leg is identified as the positive side, and the LED must face the correct direction in the circuit. That gives teachers a concrete way to explain anode and cathode without too much extra theory.
This topic also links naturally to why LEDs need resistors. Students can learn that one rule protects the LED from too much current, while the other rule makes sure the LED is facing the correct direction.
Other Common Polarized Components
Once students understand batteries and LEDs, you can expand to other parts they will see later:
- Diodes: the band marks one side and shows which way the part is oriented in the circuit. See Mr Circuit’s diode explainer.
- Electrolytic capacitors: these are polarized and usually marked with a stripe. They should not be treated like ordinary ceramic capacitors.
- Integrated circuits: many have a notch or dot to show orientation, which matters when inserting them into a breadboard.
What Does Not Usually Have Polarity?
Most beginner resistors do not have polarity. That means students can insert them in either direction and still get the same basic function. This is helpful because it prevents over-checking every part. The goal is not to make students nervous. The goal is to teach them which markings matter and when.
A solderless breadboard also does not have “part polarity” of its own, but the way students place parts on it can still create a reversed circuit path.
A Fast Classroom Polarity Check Routine
- Find the power source and identify + and - first.
- Look for any part with a long leg, stripe, band, notch, dot, or printed symbol.
- Check the schematic, kit diagram, or teacher model before inserting the part.
- Power the circuit only after students can explain why the orientation is correct.
This routine works especially well before projects such as a night-light circuit or other first breadboard builds.
Common Student Mistakes
- Assuming all two-leg parts work either way.
- Looking only at wire color and ignoring the actual terminal labels.
- Forgetting that LED leg length is easier to see before trimming.
- Reversing a part during troubleshooting and then changing other variables too.
Why This Matters Beyond One Lesson
Polarity is not just a one-day beginner rule. It shapes safe circuit building, clearer schematic reading, better troubleshooting, and stronger student habits. When students learn to pause and identify orientation before powering a circuit, they become more accurate builders and more independent problem-solvers.
Teachers using starter kits such as the Mr Circuit Lab 1 kit can use polarity as one of the first “look before power” routines that stays valuable through every later lab.
Sources and Further Reading
- SparkFun Learn: Polarity
- SparkFun Learn: Other Polarized Components
- Adafruit Learning System: Let’s Put LEDs in Things! A Basic Recipe
FAQ
What does polarity mean in one sentence?
It means direction matters, so a part or power source must face the correct way to work safely.
Do resistors have polarity?
Most basic resistors do not, so they usually work in either direction.
Why will an LED not light if it is backwards?
Because an LED is polarized and is designed to allow current in one intended direction.
Can reversed polarity damage components?
Yes. Some parts simply will not work, while others can overheat or fail if connected backwards.
What should beginners check first?
Start with the battery terminals, then inspect any part with a stripe, band, dot, notch, or long leg.